
Home automation is incredible and obviously in my opinion, a lot of fun. However, I’m sure many of you would agree that buying a product for use in your home shouldn’t have to connect to an outside computer, let alone one in another country.
Fortunately with the magic of Home Assistant and the Local Tuya plugin, I have managed to run this light locally without any loss of functionality. As you may know, Tuya is a Chinese manufacturer who creates a lot of white label IoT devices. The devices, in my experience, tend to work well, but require cloud access to work through official channels. Local Tuya, on the other hand, is a custom integration which can grant local access to these Tuya devices and can work very well for our purposes.
Unfortunately, Local Tuya, while set up to handle many different types of devices out of the box, is not able to handle the unique modes and functions of the XMCOSY+ Outdoor String Lights. However, by at least allowing access to the device API, templates and automations can be used to simplify and restore the device’s normal function locally. In this post, I hope to explain my method for solving this problem and that it will work for others.
Steps
- Set the device up in Local Tuya as a light
- Create a template light entity to control the light seamlessly
- Use Node Red to convert between hex color code and HSV
- Create entities to change the custom colors related to one of the built-in scenes
- (optional) Block light access to internet
Local Tuya
https://github.com/rospogrigio/localtuya
The documentation is pretty good at explaining how to get this custom integration installed, and then how to add your devices. Once you get your string lights added, you will have to instruct the plugin as to which data point (dp) controls which function of the light.
Here is a printout of the data points for the light from the command line tool from which local tuya is based:
{
  dps: {
    '20': false,
    '21': 'white',
    '22': 255,
    '23': 165,
    '24': '23eb230159ff38',
    '101': 'ffff0502808080ffff00'
  }
}
The explanation for each of these is as follows:
20: on/off
21: scene (white, colour, scene1, scene2, …, scene8*, scene9)
*scene 8 is the only customizable scene allowing you to select two colors
22: brightness 0-255
23: white-temp on a bizarre scale of 0 – 255
24: the light color and when in color mode, its brightness (very complicated will explain below)
101: a string storing the customizable two colors for scene8 (explained below)
Explanation of DP24
Now DP 24. This took a really really long time to figure out and I found some helpful hints on decoding Tuya colors deep in the internet and I’m sorry I can’t seem to find these sites again or else I would like to provide links and give them credit.
This is a combination of the lights hex code AND HSV (encoded in hex).
So the first 6 characters (in my example above) – 23eb23 is a simple hex code for the current color.
The 7th character is a 0. That is just a divider.
The next 7 characters are related to HSV, but each item is hex-encoded.
The first three charaters are Hue from 0-360 (ex above 159)
The following 2 characters are saturation on a scale of 0-255 (the standard is 0-100)
And the last 2 characters are Value (brightness) which is also on a scale 0-255 (and in this case the standard is 0-100)
Explanation of DP101
It seems to consist of a constant string in the beginning (example above ffff0502). It may mean something but I was not able to change it through any of the app functions and I was too scared to change it manually. If anyone knows what this might represent, please tell me.
But after that, are two back to back hex color codes. In the example above, color 1 is 808080, and color two is ffff00. I made two input selectors with a bunch of standard common color names. There is an automation and each time one of those two entities changes, the updated hex color code is inserted in the appropriate place.
The color combination is updated and selecting scene8 shows you the custom scene you just made.
Back to Local Tuya
So based on that, we will make a few entities using Local Tuya, all based around this device.
First, of course, is the light itself. You can match up the DPs as follows:
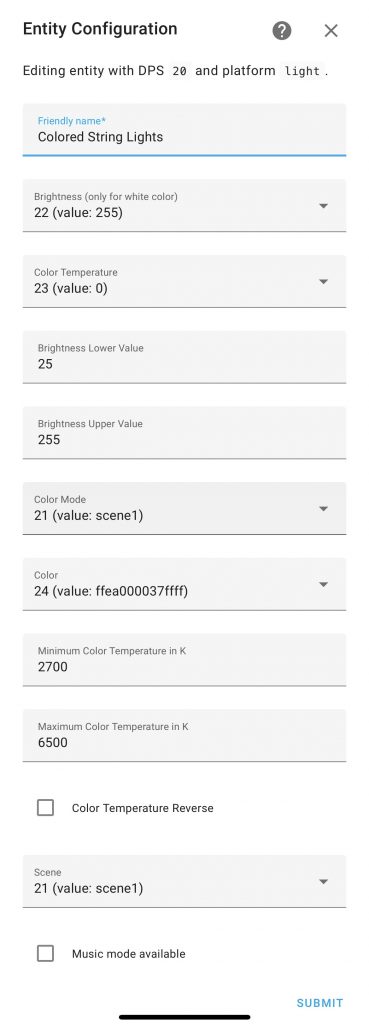
This sets up a light entity, but like I said, it is very limited. Cannot change between scenes, adjust scene colors, etc.
Next, we need to set up some sensors from LocalTuya so that we can easily access the data for use in a template light.
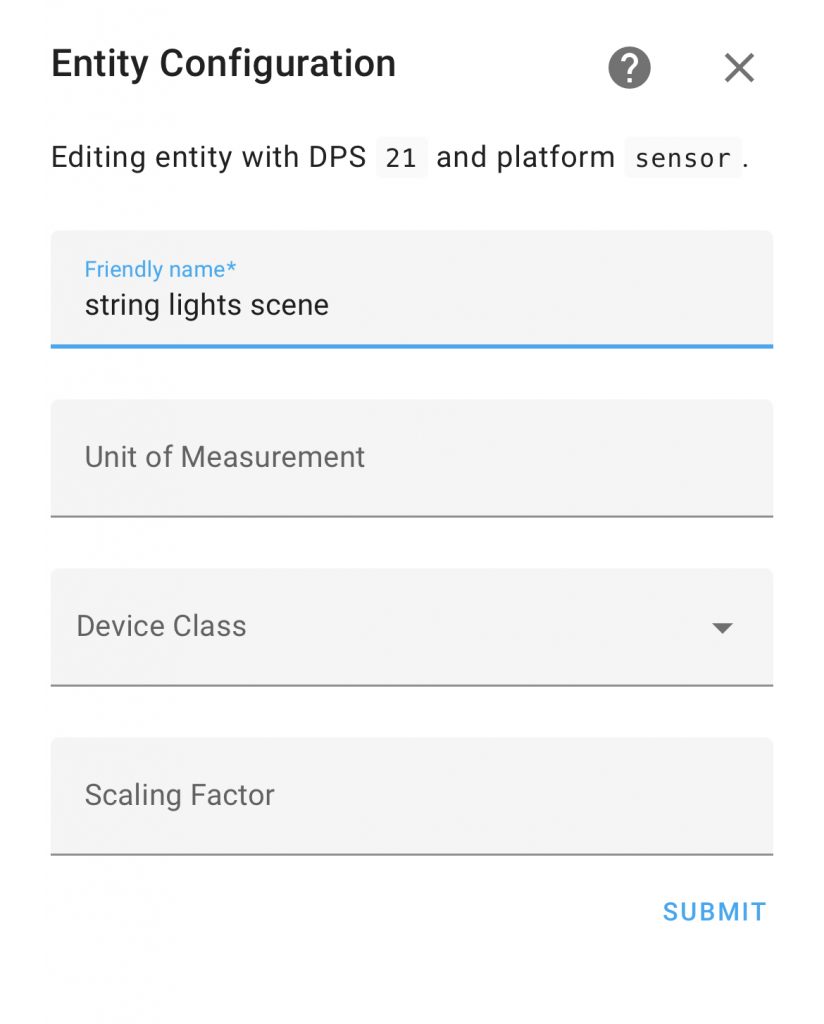
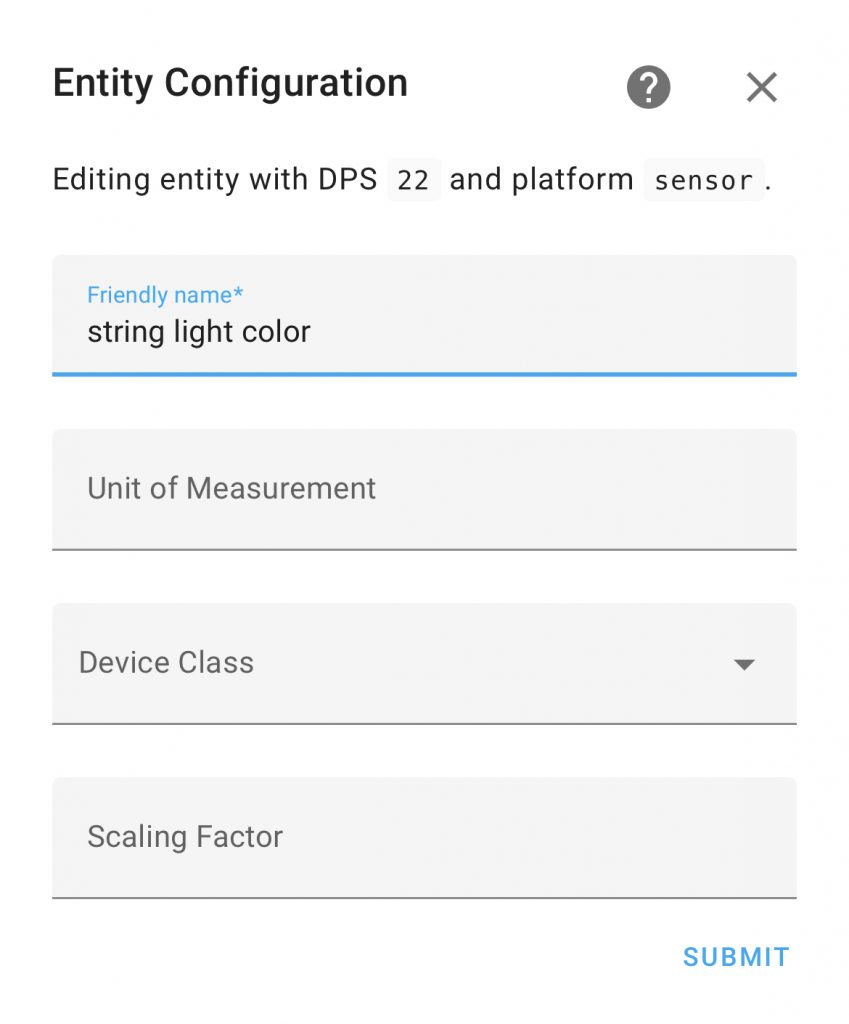
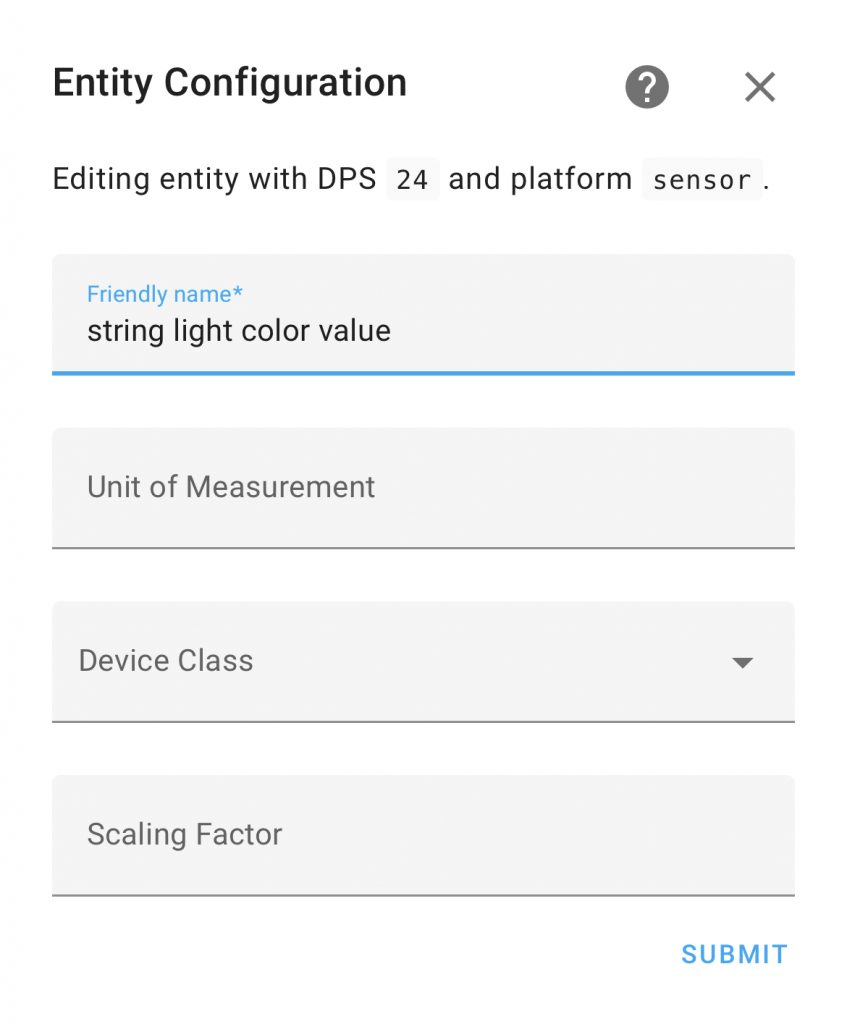
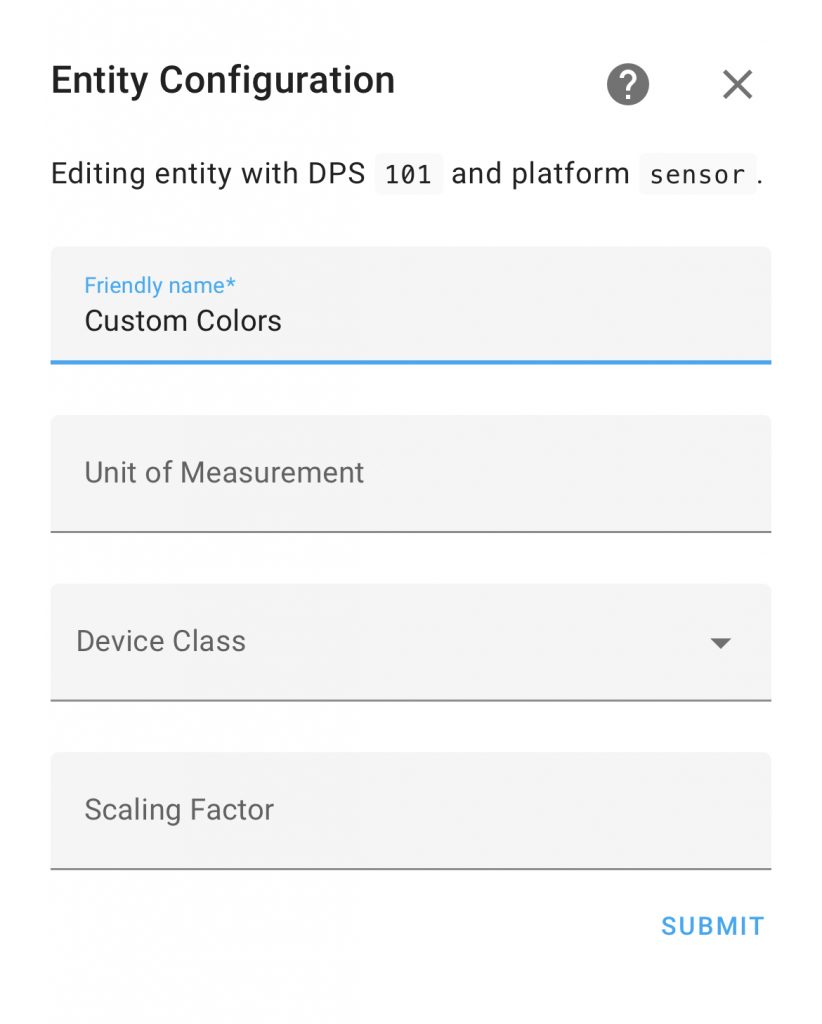
So after all this, you should have five newly create LocalTuya entities:
- light.colored_string_lights – the main light entity
- sensor.custom_colors – a sensor displaying the hex code for the two custom colors used for scene8
- sensor.string_light_color – brightness (don’t ask me why I called it this)
- sensor.string_light_color_value – the complicated hex and hsv color/brightness string
- sensor.string_lights_scene – the current scene
Now it’s time to move on to templates.
Templates
OK so now you can control the lights, but wouldn’t it be nice to package everything in a single light entity? Fortunately, we can make template entities to combine the sensors and the light entity we created with LocalTuya.
  - platform: template
    lights:
      string_lights:
        level_template: >
          {% if state_attr('light.colored_string_lights','color_mode') == 'color_temp' %}
            {{ states('sensor.string_light_color')|int }}
          {% elif state_attr('light.colored_string_lights','color_mode') == 'hs' %}
            {{ states('sensor.string_light_color_value')[12:]|int(base=16) }}
          {% else %}
            255
          {% endif %}
        value_template: "{{ states('light.colored_string_lights') }}"
        temperature_template: >
          {% if state_attr('light.colored_string_lights','color_mode') == 'color_temp' %}
            {{ state_attr('light.colored_string_lights','color_temp') }}
          {% elif state_attr('light.colored_string_lights','color_mode') == 'hs' %}
            {{ color_temp|int(default=0) }}
          {% endif %}
        color_template: >
          {% if state_attr('light.colored_string_lights','color_mode') == 'hs' %}
            {{ state_attr('light.colored_string_lights','hs_color') }}
          {% endif %}
        effect_list_template: "{{['White','Color','Strobe','Fade','Pulse','Blink','Chase','Christmas','America','Pick 2','Multi']}}"
        effect_template: >
          {% if states('sensor.string_lights_scene') == 'scene1' %}
            {{ "Strobe" }}
          {% elif states('sensor.string_lights_scene') == 'scene2' %}
            {{ "Fade" }}
          {% elif states('sensor.string_lights_scene') == 'scene3' %}
            {{ "Pulse" }}
          {% elif states('sensor.string_lights_scene') == 'scene4' %}
            {{ "Blink" }}
          {% elif states('sensor.string_lights_scene') == 'scene5' %}
            {{ "Chase" }}
          {% elif states('sensor.string_lights_scene') == 'scene6' %}
            {{ "Christmas" }}
          {% elif states('sensor.string_lights_scene') == 'scene7' %}
            {{ "America" }}
          {% elif states('sensor.string_lights_scene') == 'scene8' %}
            {{ "Pick 2" }}
          {% elif states('sensor.string_lights_scene') == 'scene9' %}
            {{ "Multi" }}
          {% elif states('sensor.string_lights_scene') == 'white' %}
            {{ "White" }}
          {% elif states('sensor.string_lights_scene') == 'colour' %}
            {{ "Color" }}
          {% endif %}
        min_mireds_template: "{{ state_attr('light.colored_string_lights','min_mireds') }}"
        max_mireds_template: "{{ state_attr('light.colored_string_lights','max_mireds') }}"
        turn_on:
          service: light.turn_on
          target:
            entity_id: light.colored_string_lights
        turn_off:
          service: light.turn_off
          target:
            entity_id: light.colored_string_lights
        set_level:
          - service: script.brightness_with_white_or_color
            data:
              brightness: '{{ brightness|int }}'
        set_color:
          - service: script.check_color_mode
            data:
              h: '{{ hs[0] }}'
              s: '{{ hs[1] }}'
        set_temperature:
          - service: script.check_white_mode
            data:
              color_temp: '{{color_temp|int }}'
        set_effect:
          - service: localtuya.set_dp
            data:
              device_id: eb3f15638dccc2fe59wdgj
              dp: 21
              value: >
                {% if effect == 'Strobe' %}
                  {{ "scene1" }}
                {% elif effect == 'Fade' %}
                  {{ "scene2" }}
                {% elif effect == 'Pulse' %}
                  {{ "scene3" }}
                {% elif effect == 'Blink' %}
                  {{ "scene4" }}
                {% elif effect == 'Chase' %}
                  {{ "scene5" }}
                {% elif effect == 'Christmas' %}
                  {{ "scene6" }}
                {% elif effect == 'America' %}
                  {{ "scene7" }}
                {% elif effect == 'Pick 2' %}
                  {{ "scene8" }}
                {% elif effect == 'Multi' %}
                  {{ "scene9" }}
                {% elif effect == 'White' %}
                  {{ "white" }}
                {% elif effect == 'Color' %}
                  {{ "colour" }}
                {% endif %}
alias: check white mode
sequence:
- if:
- condition: not
conditions:
- condition: state
entity_id: sensor.string_lights_scene
state: white
then:
- service: localtuya.set_dp
data:
device_id: eb3f15638dccc2fe59wdgj
dp: 21
value: white
- service: light.turn_on
data:
color_temp: '{{ color_temp }}'
entity_id: light.colored_string_lights
mode: singlealias: check color mode
sequence:
- if:
- condition: not
conditions:
- condition: state
entity_id: sensor.string_lights_scene
state: colour
then:
- service: localtuya.set_dp
data:
device_id: eb3f15638dccc2fe59wdgj
dp: 21
value: colour
- wait_for_trigger:
- platform: state
entity_id:
- sensor.string_lights_scene
to: colour
timeout: '1'
- service: light.turn_on
data:
hs_color:
- '{{ h }}'
- '{{ s }}'
entity_id: light.colored_string_lightsOne issue I noticed is that the brightness value is only relevant when the light is in white mode. When the light is in a color mode, the brightness is part of the hex/hsv string. This template selects the correct brightness based on the mode. When the light is showing a scene other than color or white, brightness is always at 100%. I believe that is a limitation of the light.
Anyway, to make sure the correct brightness value is modified when you modify the brightness from the light entity in home assistant, I offloaded that to a script seen below:
alias: brightness with white or color
sequence:
  - choose:
      - conditions:
          - condition: template
            value_template: >-
              {{ state_attr('light.colored_string_lights','color_mode') ==
              'color_temp' }}
        sequence:
          - service: localtuya.set_dp
            data:
              device_id: eb3f15638dccc2fe59wdgj
              dp: 22
              value: '{{brightness|int}}'
    default:
      - service: rest_command.color_converter
        data:
          brightness: '{{brightness|int}}'
      - service: localtuya.set_dp
        data:
          device_id: eb3f15638dccc2fe59wdgj
          dp: 24
          value: >
            {{ states('sensor.color_output') }}{{
            states('sensor.string_light_color_value')[6:12] }}{{ "%0x" | format(
            brightness | int ) }}
mode: single
Another issue was converting between HSV and hex colors. I could not find an easy formula or function to accomplish this in Home Assistant. After much searching, I found a module to use in Node Red.
Color and Brightness
This is important for the DP24 which controls color and brightness when in single color mode. Basically, a hex value and hex encoded HSV is given each time. Just changing the hex value would change the color but reset the lights back to 100%. Apparently you need to change both and they need to match? Converting with template got complicated and I could not figure out a way to solve it. After much searching, I came across a module in Node Red.
I am not a Node Red power user. I do very few things with it, and it feels like whenever I use it, I have to relearn it.
So to start, I needed a way to get information from home assistant to Node Red. I used a rest command in Home Assistant to send information to an HTTP receiver in Node Red:
  change_color_not_brightness:
    url: http://nodered:1880/color-converter
    method: POST
    payload: '{"hsv":{"hue":{{ h }},"saturation":{{ s }},"brightness":{{ (state_attr(''light.string_lights'',''brightness'')/2.55)|int}}}}'
    content_type:  'application/json; charset=utf-8'
    verify_ssl: false
This sends over the current color and brightness in HSV.
Node Red
Now to switch gears to Node Red. For those who don’t know, it is a very commonly used add-on for Home Assistant, for creating automations by visually programming in Java. Many people use it exclusively for automations and don’t touch the built-in YAML-based automations. Aside from the ease of creating automations, it also has access to a number of add-on modules which can add additional functions to your palette.
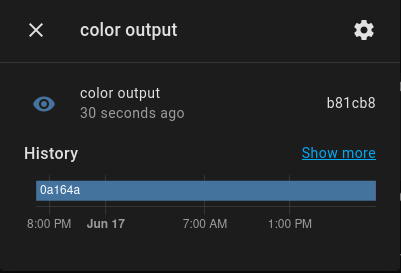
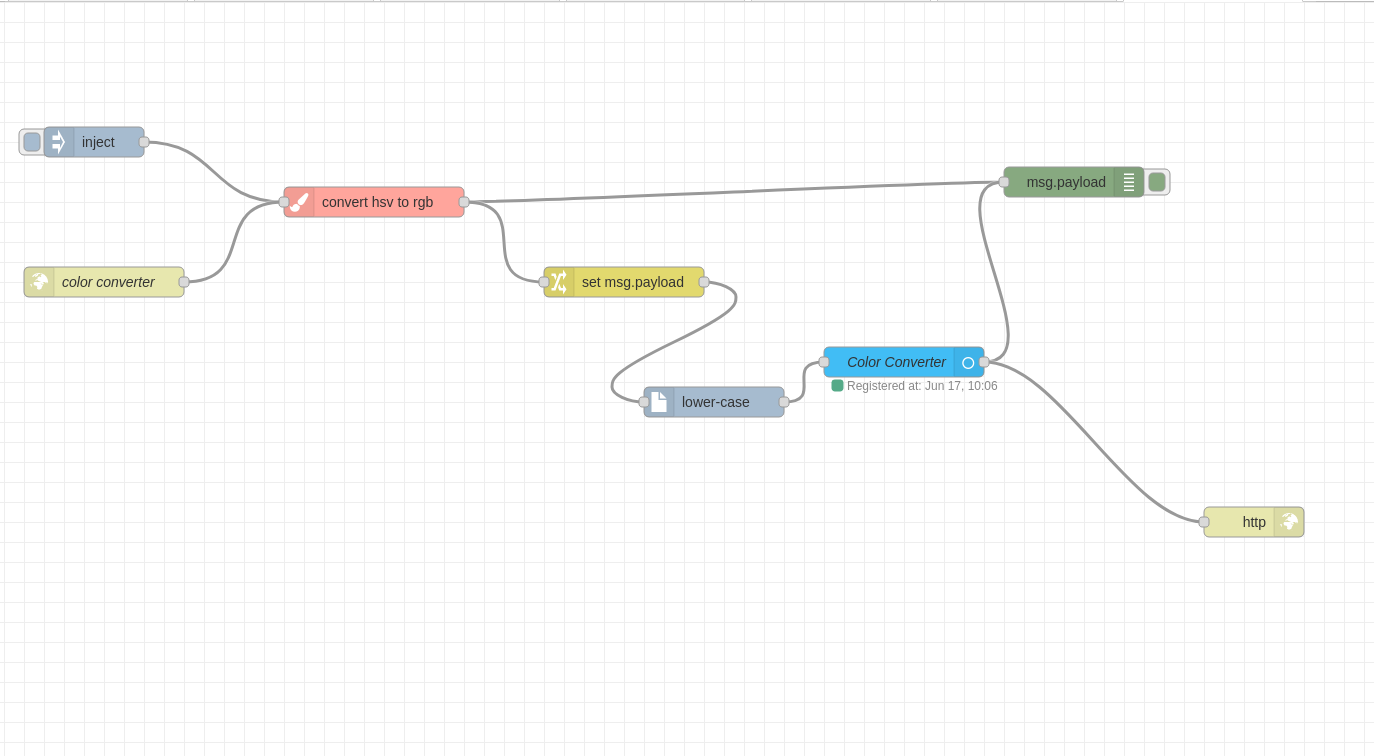
The one we will need is called node-red-contrib-colorspace. It allowed me to create a “Flow” which received the HSV value through HTTP request, convert it to rgb, and send it back to Home Assistant. I send it back by using the Home Assistant nodes to update a sensor called “sensor.color_output”.
My flow looks like this:
Final Product
Ok, so now we have a fully functional entity called “light.string_lights”. It can control (almost) every light function as one would expect from a regular Home Assistant light entity.
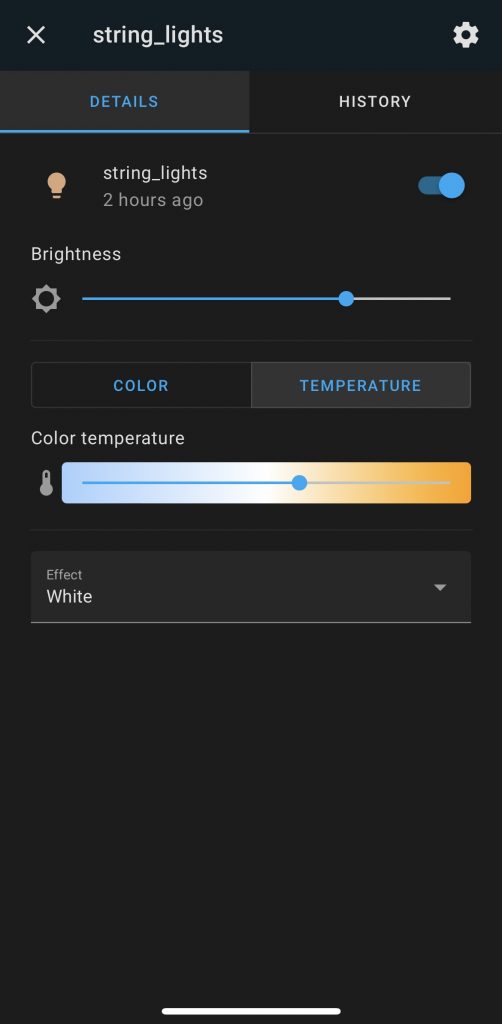
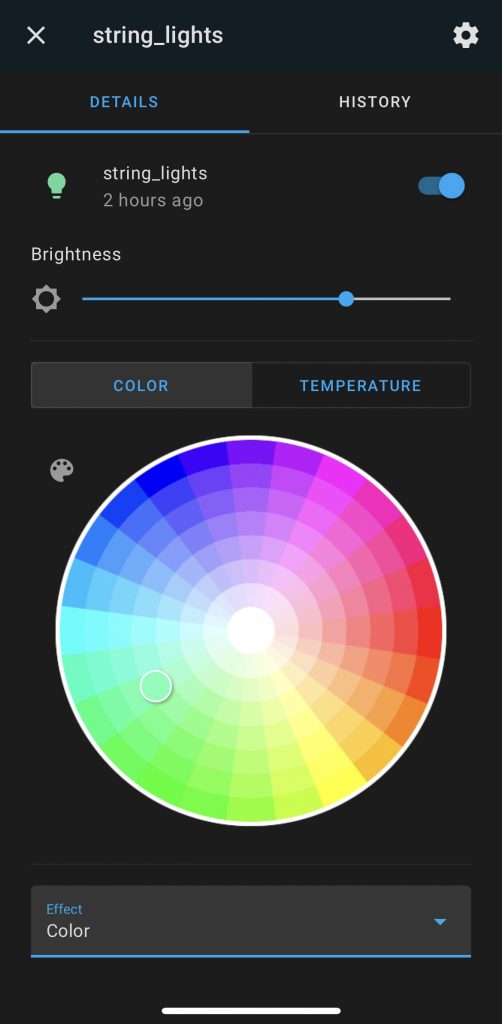
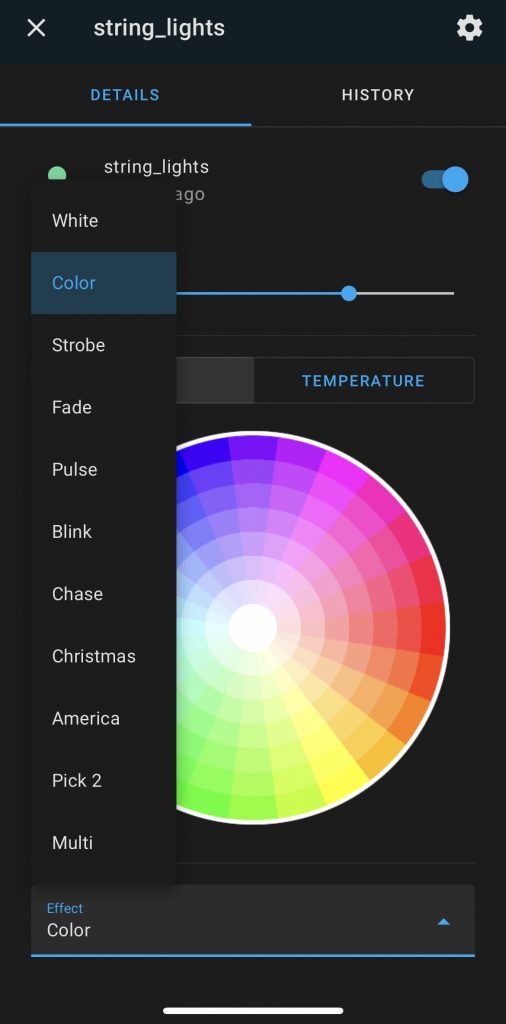
It can control brightness, color, and the scenes. It can change brightness for color or white seamlessly. But there’s one more thing- scene8.
scene8
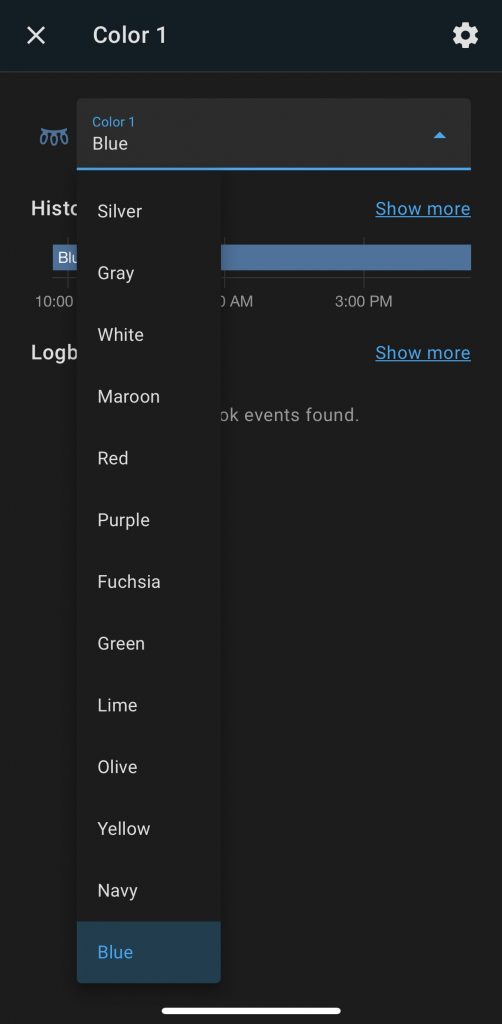
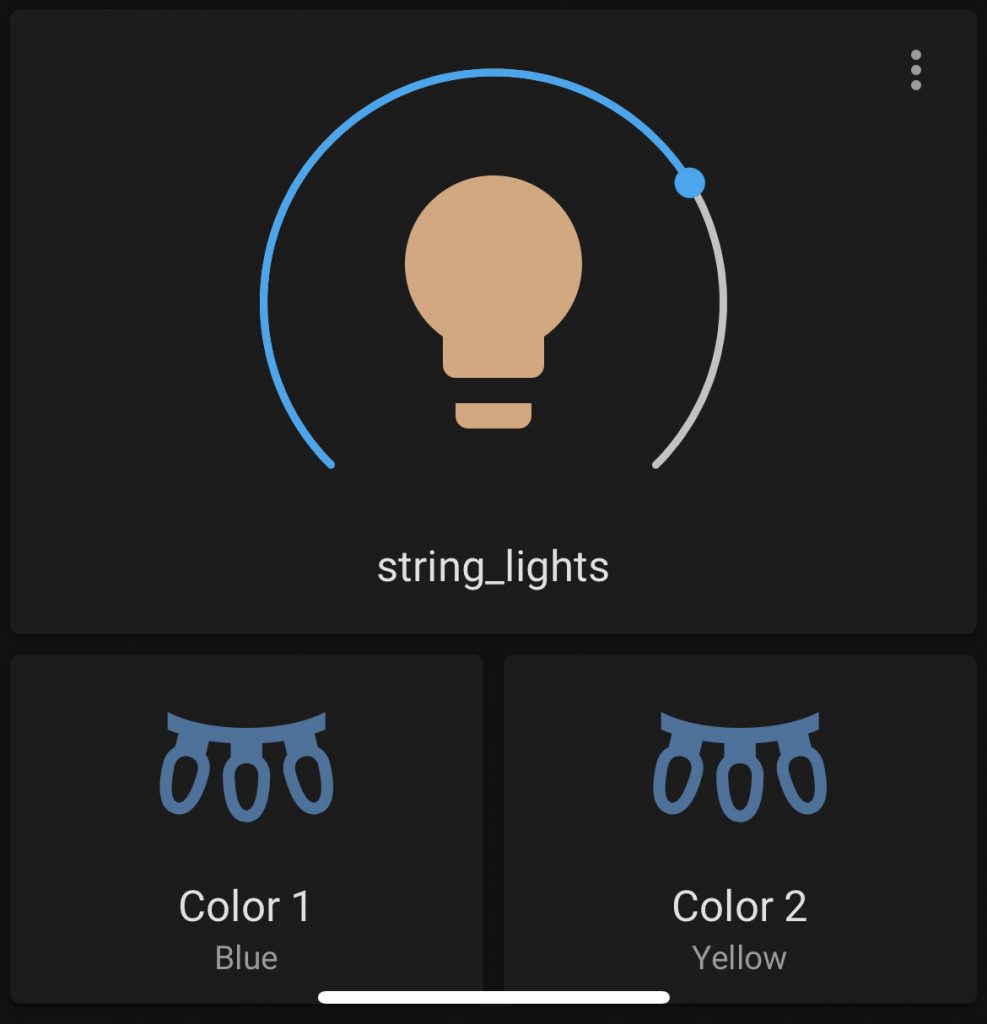
Scene 8 is one of 9 scenes, and is the only customizable one. It alternates two colors which can be changed independently. I made two select entities for them. I just chose a handful of colors and created a dropdown menu although it would be possible to choose any color as well.

Whenever these entities are changed, they trigger an automation to change the color of the light:
alias: Change string light colors
description: ''
trigger:
  - platform: state
    entity_id: input_select.color_1
    id: color1
  - platform: state
    entity_id: input_select.color_2
    id: color2
condition: []
action:
  - choose:
      - conditions:
          - condition: trigger
            id: color1
        sequence:
          - service: localtuya.set_dp
            data:
              device_id: eb3f15638dccc2fe59wdgj
              dp: 101
              value: >
                {% if states('input_select.color_1') == 'Black' %}
                  {% set new1 = '000000' %}
                {% elif states('input_select.color_1') == 'Silver' %}
                  {% set new1 = 'c0c0c0' %}
                {% elif states('input_select.color_1') == 'Gray' %}
                  {% set new1 = '808080' %}
                {% elif states('input_select.color_1') == 'White' %}
                  {% set new1 = 'ffffff' %}
                {% elif states('input_select.color_1') == 'Maroon' %}
                  {% set new1 = '800000' %}
                {% elif states('input_select.color_1') == 'Red' %}
                  {% set new1 = 'ff0000' %}
                {% elif states('input_select.color_1') == 'Purple' %}
                  {% set new1 = '800080' %}
                {% elif states('input_select.color_1') == 'Fuchsia' %}
                  {% set new1 = 'ff00ff' %}
                {% elif states('input_select.color_1') == 'Green' %}
                  {% set new1 = '008000' %}
                {% elif states('input_select.color_1') == 'Lime' %}
                  {% set new1 = '00ff00' %}
                {% elif states('input_select.color_1') == 'Olive' %}
                  {% set new1 = '808000' %}
                {% elif states('input_select.color_1') == 'Yellow' %}
                  {% set new1 = 'ffff00' %}
                {% elif states('input_select.color_1') == 'Navy' %}
                  {% set new1 = '000080' %}
                {% elif states('input_select.color_1') == 'Blue' %}
                  {% set new1 = '0000ff' %}
                {% elif states('input_select.color_1') == 'Teal' %}
                  {% set new1 = '008080' %}
                {% elif states('input_select.color_1') == 'Aqua' %}
                  {% set new1 = '00ffff' %}
                {% endif %}

                {{ 'ffff0502' }}{{new1}}{{
                states('sensor.custom_colors').split('ffff0502')[1][6:] }}
      - conditions:
          - condition: trigger
            id: color2
        sequence:
          - service: localtuya.set_dp
            data:
              device_id: eb3f15638dccc2fe59wdgj
              dp: 101
              value: >
                {% if states('input_select.color_2') == 'Black' %}
                  {% set new2 = '000000' %}
                {% elif states('input_select.color_2') == 'Silver' %}
                  {% set new2 = 'c0c0c0' %}
                {% elif states('input_select.color_2') == 'Gray' %}
                  {% set new2 = '808080' %}
                {% elif states('input_select.color_2') == 'White' %}
                  {% set new2 = 'ffffff' %}
                {% elif states('input_select.color_2') == 'Maroon' %}
                  {% set new2 = '800000' %}
                {% elif states('input_select.color_2') == 'Red' %}
                  {% set new2 = 'ff0000' %}
                {% elif states('input_select.color_2') == 'Purple' %}
                  {% set new2 = '800080' %}
                {% elif states('input_select.color_2') == 'Fuchsia' %}
                  {% set new2 = 'ff00ff' %}
                {% elif states('input_select.color_2') == 'Green' %}
                  {% set new2 = '008000' %}
                {% elif states('input_select.color_2') == 'Lime' %}
                  {% set new2 = '00ff00' %}
                {% elif states('input_select.color_2') == 'Olive' %}
                  {% set new2 = '808000' %}
                {% elif states('input_select.color_2') == 'Yellow' %}
                  {% set new2 = 'ffff00' %}
                {% elif states('input_select.color_2') == 'Navy' %}
                  {% set new2 = '000080' %}
                {% elif states('input_select.color_2') == 'Blue' %}
                  {% set new2 = '0000ff' %}
                {% elif states('input_select.color_2') == 'Teal' %}
                  {% set new2 = '008080' %}
                {% elif states('input_select.color_2') == 'Aqua' %}
                  {% set new2 = '00ffff' %}
                {% endif %}

                {{ 'ffff0502' }}{{
                states('sensor.custom_colors').split('ffff0502')[1][:6] }}{{
                new2 }}
    default: []
mode: single
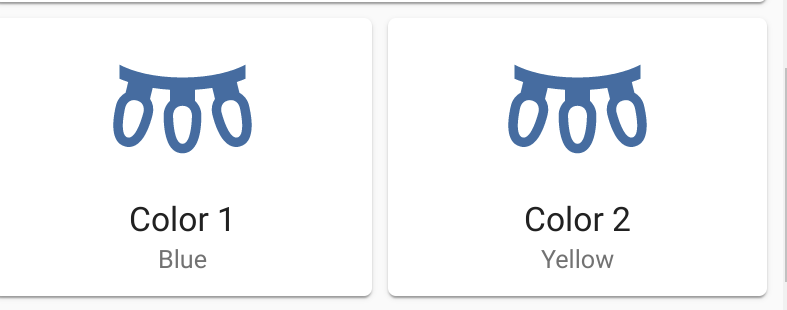
To confirm the light color was changed to the desired color, I also made two sensors to read the scene’s custom colors from the light itself.
- sensor:
      - name: "Custom Color 2"
        state: >
          {% if states('sensor.custom_colors').split('ffff0502')[1][6:] == '000000' %}
            {{ 'Black' }}
          {% elif states('sensor.custom_colors').split('ffff0502')[1][6:] == 'c0c0c0' %}
            {{ 'Silver' }}
          {% elif states('sensor.custom_colors').split('ffff0502')[1][6:] == '808080' %}
            {{ 'Gray' }}
          {% elif states('sensor.custom_colors').split('ffff0502')[1][6:] == 'ffffff' %}
            {{ 'White' }}
          {% elif states('sensor.custom_colors').split('ffff0502')[1][6:] == '800000' %}
            {{ 'Maroon' }}
          {% elif states('sensor.custom_colors').split('ffff0502')[1][6:] == 'ff0000' %}
            {{ 'Red' }}
          {% elif states('sensor.custom_colors').split('ffff0502')[1][6:] == '800080' %}
            {{ 'Purple' }}
          {% elif states('sensor.custom_colors').split('ffff0502')[1][6:] == 'ff00ff' %}
            {{ 'Fuchsia' }}
          {% elif states('sensor.custom_colors').split('ffff0502')[1][6:] == '008000' %}
            {{ 'Green' }}
          {% elif states('sensor.custom_colors').split('ffff0502')[1][6:] == '00ff00' %}
            {{ 'Lime' }}
          {% elif states('sensor.custom_colors').split('ffff0502')[1][6:] == '808000' %}
            {{ 'Olive' }}
          {% elif states('sensor.custom_colors').split('ffff0502')[1][6:] == 'ffff00' %}
            {{ 'Yellow' }}
          {% elif states('sensor.custom_colors').split('ffff0502')[1][6:] == '000080' %}
            {{ 'Navy' }}
          {% elif states('sensor.custom_colors').split('ffff0502')[1][6:] == '0000ff' %}
            {{ 'Blue' }}
          {% elif states('sensor.custom_colors').split('ffff0502')[1][6:] == '008080' %}
            {{ 'Teal' }}
          {% elif states('sensor.custom_colors').split('ffff0502')[1][6:] == '00ffff' %}
            {{ 'Aqua' }}
          {% else %}
            {{ states('sensor.custom_colors').split('ffff0502')[1][6:] }}
          {% endif %}
- sensor:
      - name: "Custom Color 1"
        state: >
          {% if states('sensor.custom_colors').split('ffff0502')[1][:6] == '000000' %}
            {{ 'Black' }}
          {% elif states('sensor.custom_colors').split('ffff0502')[1][:6] == 'c0c0c0' %}
            {{ 'Silver' }}
          {% elif states('sensor.custom_colors').split('ffff0502')[1][:6] == '808080' %}
            {{ 'Gray' }}
          {% elif states('sensor.custom_colors').split('ffff0502')[1][:6] == 'ffffff' %}
            {{ 'White' }}
          {% elif states('sensor.custom_colors').split('ffff0502')[1][:6] == '800000' %}
            {{ 'Maroon' }}
          {% elif states('sensor.custom_colors').split('ffff0502')[1][:6] == 'ff0000' %}
            {{ 'Red' }}
          {% elif states('sensor.custom_colors').split('ffff0502')[1][:6] == '800080' %}
            {{ 'Purple' }}
          {% elif states('sensor.custom_colors').split('ffff0502')[1][:6] == 'ff00ff' %}
            {{ 'Fuchsia' }}
          {% elif states('sensor.custom_colors').split('ffff0502')[1][:6] == '008000' %}
            {{ 'Green' }}
          {% elif states('sensor.custom_colors').split('ffff0502')[1][:6] == '00ff00' %}
            {{ 'Lime' }}
          {% elif states('sensor.custom_colors').split('ffff0502')[1][:6] == '808000' %}
            {{ 'Olive' }}
          {% elif states('sensor.custom_colors').split('ffff0502')[1][:6] == 'ffff00' %}
            {{ 'Yellow' }}
          {% elif states('sensor.custom_colors').split('ffff0502')[1][:6] == '000080' %}
            {{ 'Navy' }}
          {% elif states('sensor.custom_colors').split('ffff0502')[1][:6] == '0000ff' %}
            {{ 'Blue' }}
          {% elif states('sensor.custom_colors').split('ffff0502')[1][:6] == '008080' %}
            {{ 'Teal' }}
          {% elif states('sensor.custom_colors').split('ffff0502')[1][:6] == '00ffff' %}
            {{ 'Aqua' }}
          {% else %}
            {{ states('sensor.custom_colors').split('ffff0502')[1][:6] }}
          {% endif %}
That produces these two entities:
Finally
Our light is finished and fully controllable locally. The next step is to block the light’s internet access from your router.
Hope this helps some people! Let me know if you have any questions!
Link to Purchase
Affiliate Link:
XMCOSY+ Outdoor String Lights, 49Ft
Non-Affiliate Link:

